Retropie: Wii and GameCube Game Support
This tutorial explains how to get Wii and GameCube games working. This method only applies to PC installations of Retropie and is incompatible with Raspberry Pi installations.
This tutorial is related to the RetroPie PC Installation Guide.
Emulator Installation
We'll use the Dolphin emulator, which is dedicated to Wii and GameCube games. Specifically, we'll use lr-dolphin, a RetroArch core for Dolphin that provides good integration with RetroPie, particularly for controller management.
In your EmulationStation interface, go to the RetroPie menu, then RetroPie setup. In the window that appears, navigate to Manage packages > Manage experimental packages > lr-dolphin > Install from source.
Once installation is complete, exit the RetroPie setup tool.
Important: If you followed the PC and Steam Games with Retropie tutorial, you probably manually configured
/opt/retropie/configs/all/emulationstation/es_systems.cfgto add PC game entries. If so, you must now manually copy the wii and gc sections from/etc/emulationstation/es_systems.cfgto your/opt/retropie/configs/all/emulationstation/es_systems.cfgfile.
Adding Games
Note: Some Wii games require a Wiimote or nunchuck to be playable. If you're using a standard joystick and buttons, only games compatible with classic controllers will work, like Mario Kart Wii.
Place your Wii games in /home/pi/RetroPie/roms/wii and GameCube games in /home/pi/RetroPie/roms/gc. Supported file extensions are: .iso, .wbfs, .elf, .gcm, .dol, .tgc, .ciso, .gcz, and .wad.
After adding your games, restart EmulationStation and you'll see Wii and/or GameCube menus appear.
Controller Configuration
Your game controllers need to be recognized as Wii or GameCube controllers.
We'll use arcade-style controllers as an example (joystick + buttons per player). For this setup, you've likely configured RetroPie so the joystick acts as a directional pad (e.g., joystick up triggers UP action).
For Wii and GameCube, some games may not use the directional pad, instead using the analog stick for both menus and gameplay.
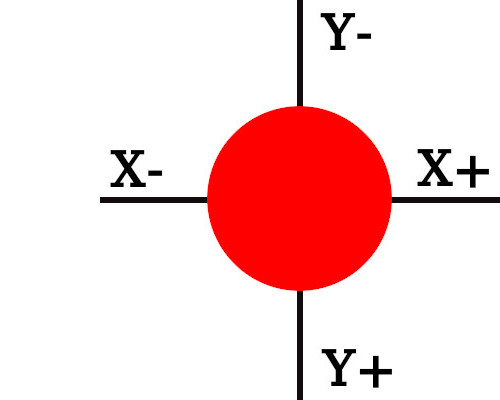
If this occurs, you can remap controls. In-game, press Hotkey+X to access Retroarch's Quick Menu. In the Controls submenu, you can remap:
- Up → Control Stick Y-
- Down → Control Stick Y+
- Left → Control Stick X-
- Right → Control Stick X+
This makes the joystick act as an analog stick. Repeat for each controller (User 1, User 2...).

You can then:
- Save this mapping for all games using this emulator with Save Core Remap File, or
- Save it for just one game with Save Game Remap File.
If you chose option 1, repeat this process for one Wii game and one GameCube game so both systems benefit from the remapping.
You can also remap other buttons if Wii/GameCube controls don't match your arcade layout.
Press Hotkey+X to exit the Quick Menu when finished.
Wii-Specific Configuration
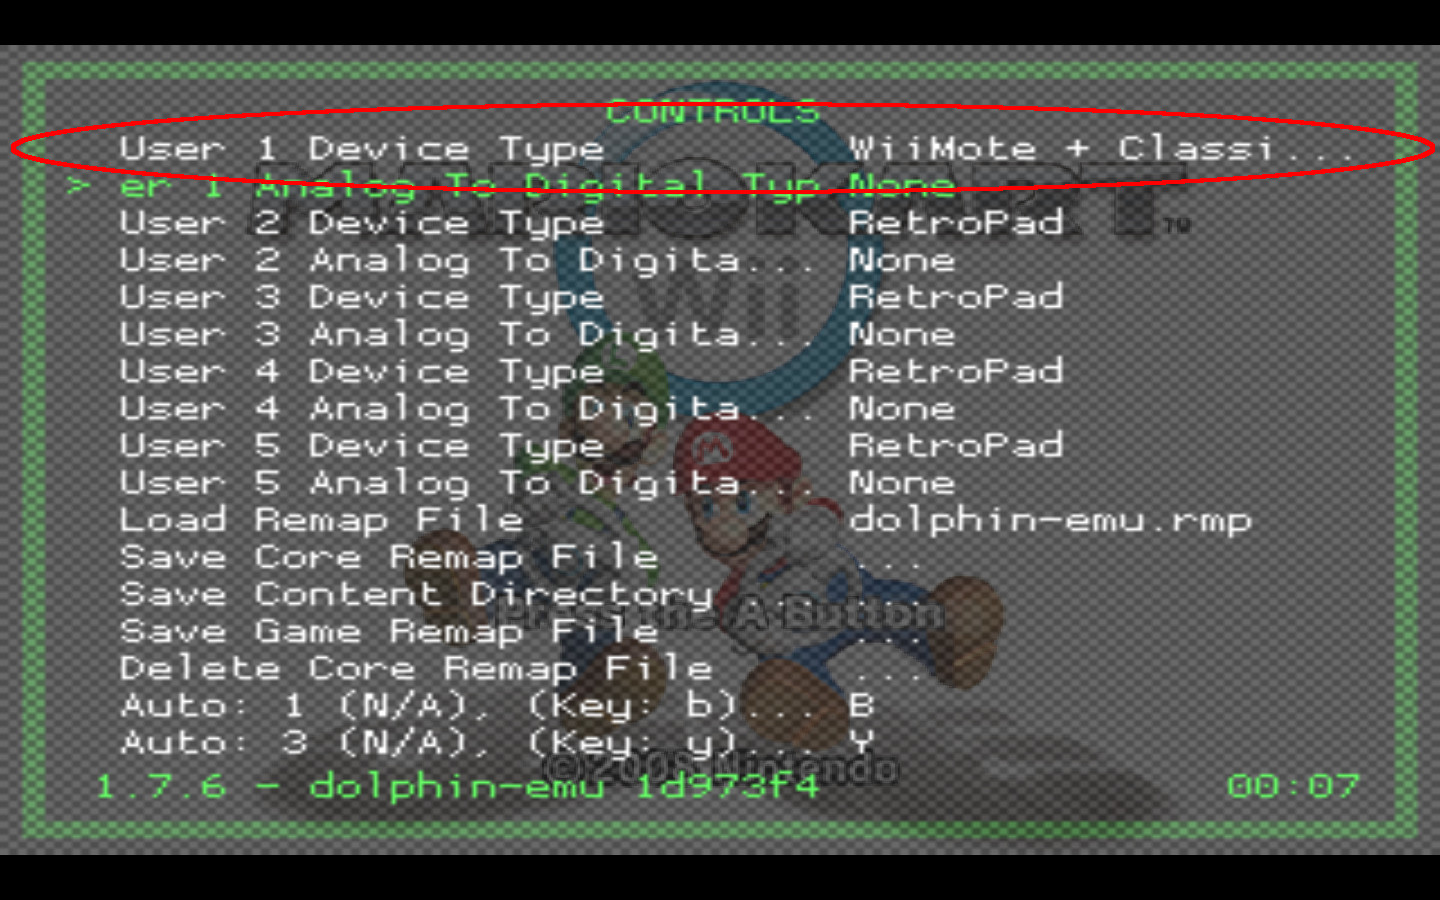
For arcade controllers to work properly with Wii emulation, configure them as Classic Controllers. In Retroarch's Quick Menu (Hotkey+X), go to Controls and set:
- User 1 device type to Wiimote + Classic Controller
- Repeat for other controllers (User 2, User 3...)
Settings
Disabling On-Screen Messages
The emulator displays informational messages (like GPU info) at game startup. To hide these in Wii games, edit ~/RetroPie/roms/wii/User/Config/Dolphin.ini and change:
OnScreenDisplayMessages = Trueto:
OnScreenDisplayMessages = FalseMake the same change for GameCube games in ~/RetroPie/roms/gc/User/Config/Dolphin.ini.
Hiding Wiimote Screens (Wii)
Some games show Wiimote usage screens at startup. For arcade setups without Wiimotes, we can replace these images.
- Download Dolphin from https://dolphin-emu.org and install it on your PC.
- Configure Dolphin to dump textures:
- Set a Dump Folder in Config > Paths
- Enable Dump Textures in Graphics > Advanced > Utility
- Launch your game and let it load Wiimote screens, then exit.
- Find the Wiimote-related textures in your dump folder (note filenames and resolutions).
- On RetroPie:
- Enable Load Custom Textures in Retroarch's Options menu (Hotkey+X)
- Create
~/RetroPie/roms/wii/User/Load/Textures/[GAME_ID] - Add your replacement images (same names/resolutions as originals)
- PC: Config > Wii and GameCube tabs
- RetroPie: Retroarch's Options menu
Troubleshooting
Mario Kart Wii
If you get the error "Could not write to/read from Wii system memory", download: https://mathieu-abati.com/resources/guides/versusbox/wii_mariokart_title.tar.xz
and extract it to: ~/RetroPie/roms/wii/User/Wii